- Relief printing
- Intaglio and planographic printing
- Color printing
- Bits and pieces
- Early photography in silver
- Non-silver processes
- Modern photography
- Color notes
- Color photography
- Photography in ink: relief and intaglio printing
- Photography in ink: planographic printing
- Digital processes
- Where do we go from here?
Digital halftones and stochastic printing

Stochastic print. Richard Benson. Richard and Tanya Donnelly. 1989 (Printed 1994). 11 x 13 3/4" (28 x 35 cm). The Museum of Modern Art, New York. Gift of Richard Benson © Richard Benson.
The old printer’s halftone dot was an analog creature, not a digital one. It was binary—which is to say that densities in the halftone negative were either completely opaque or completely clear—but the dot itself varied smoothly in size, from a tiny black dot for the highlights of a print to a tiny white dot, in a black field, for a dark tone. These variations in size were an analog of the tones in the picture. When printing went digital the computer developers faced the problem of how to render this dot with the new tools.
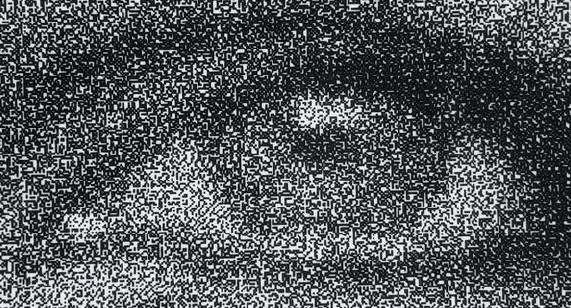
Detail of Stochastic print. Richard Benson. Richard and Tanya Donnelly. 1989 (Printed 1994). 11 x 13 3/4" (28 x 35 cm). The Museum of Modern Art, New York. Gift of Richard Benson © Richard Benson.
The solution was to use an exposure device, called an “imagesetter,” with far higher resolution than the halftone dots themselves. When digitally generated film is to be exposed to make a halftone negative for use on an offset printing plate, the exposure device is a fine laser, of the same sort used in a laser printer. If the laser resolution is high enough, it can build up a representation of the halftone dot within a small grid by simply adding more laser dots for each step up in the density required in the final print. If the laser can expose 2,400 dots per linear inch, and a final halftone resolution of 200 dots per linear inch is desired, then the grid within which each dot is built will be 12 laser points per side. Each square in the grid can then fit up to 144 laser dots. A highlight (in a positive piece of film) might be 4 dots clustered together. A mid-tone would be 72 laser dots, set together to emulate a round dot covering half the area of the grid. For a dark shadow tone, nearly black, the grid square would be completely covered with exposed points on the film except for a small group left clear, clustered together, to make a white dot in a black field. By building the image up to emulate the old halftone dot, digital technology can deliver a structure that is virtually identical to the one made by the earlier halftone screens. This makes the offset printers happy.
Stochastic screening was a natural extension of this practice. As the offset presses became better and better, and capable of printing extremely fine dots, some smart character figured out that the tiny laser points didn’t need to be clustered to imitate a coarse halftone. In stochastic screening the dots are laid down in the grid in a random pattern, still covering the right percentage of the grid to represent the tone needed in any area, but arrayed as tiny marks in a random pattern. The grain of this pattern can be far finer than in the halftone. Images screened this way have no visible halftone dot when seen by the naked eye, but the resolution of the image is the same as though a coarse dot were still being used. The resolution is determined by the grid size, which remains the same in either case.
The Printed Picture
![]()